In this article
Create Your First Booking Link
A booking link is the page guests use to choose a time and submit their details. Dlopo creates a working draft first, then opens the link editor so you can replace the placeholder details, review availability, and test the guest experience.
Before you begin
Dlopo assigns your default schedule to a new booking link. If you have not reviewed your working hours yet, you can still create the link and change its scheduling settings afterward.
The Free plan includes one active public booking link. When another public link is already active, a newly created link remains a draft until you hide the existing link or upgrade.
Create the booking link
- Open Links.
- Select New Link using the plus button beside the search field.
- Wait for Dlopo to create the draft and open its editor.
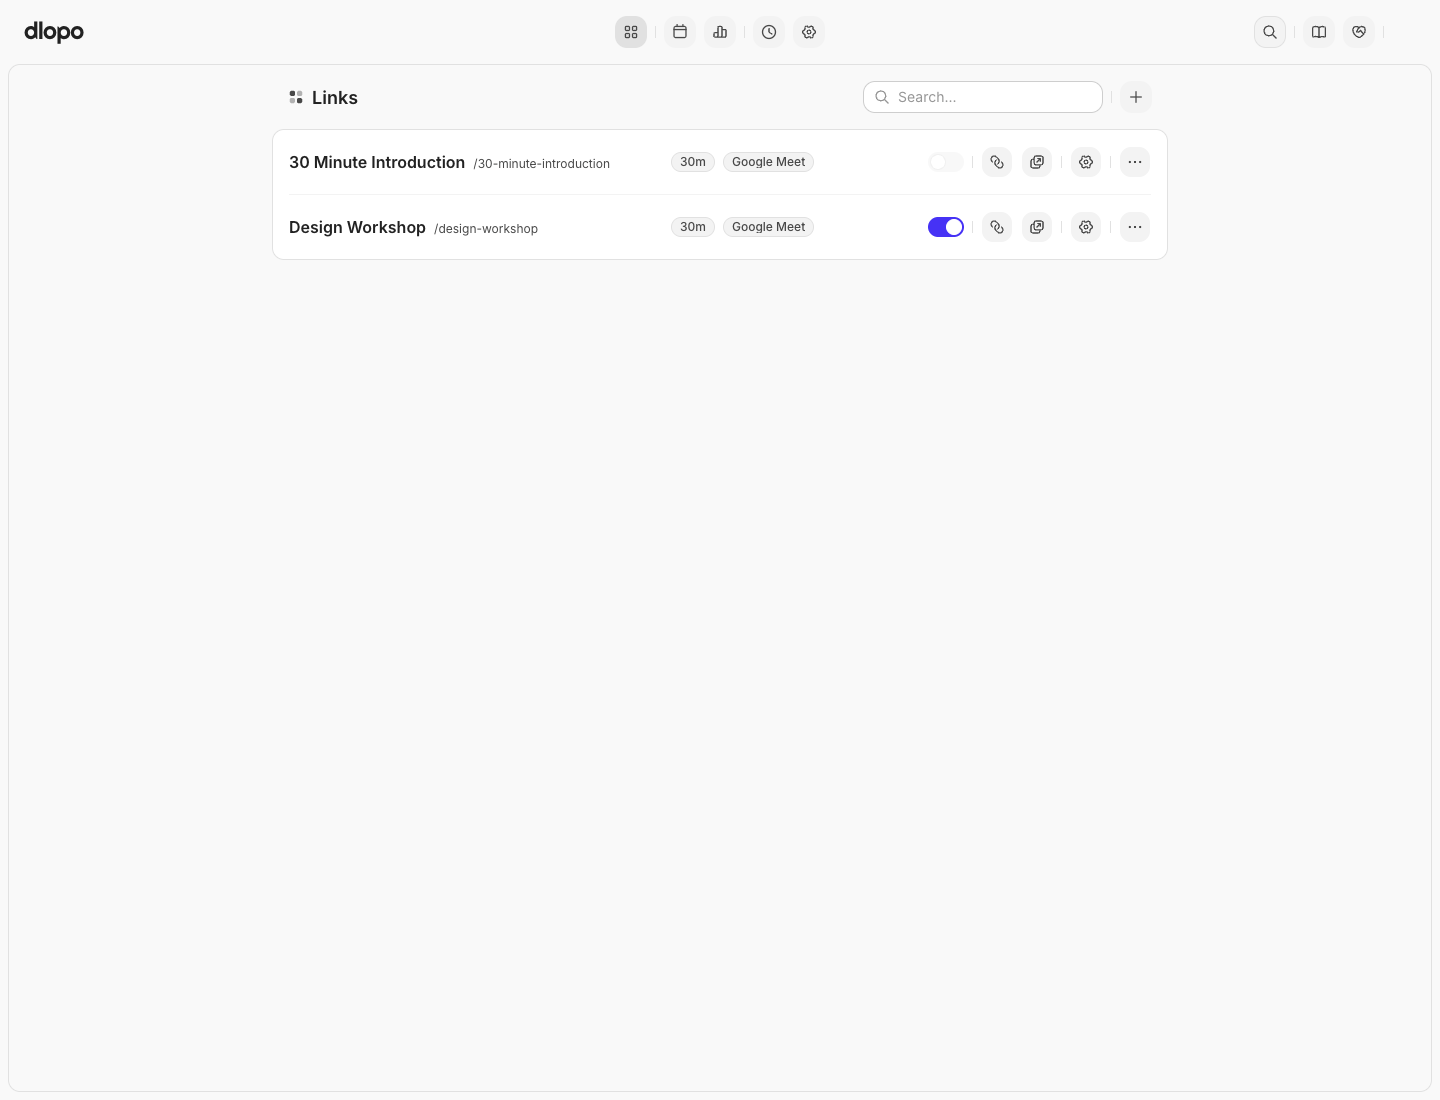
Dlopo creates a standard self-scheduling link named “Untitled Link.” It starts at 30 minutes, uses Google Meet as its location, and uses the default schedule when one is available.
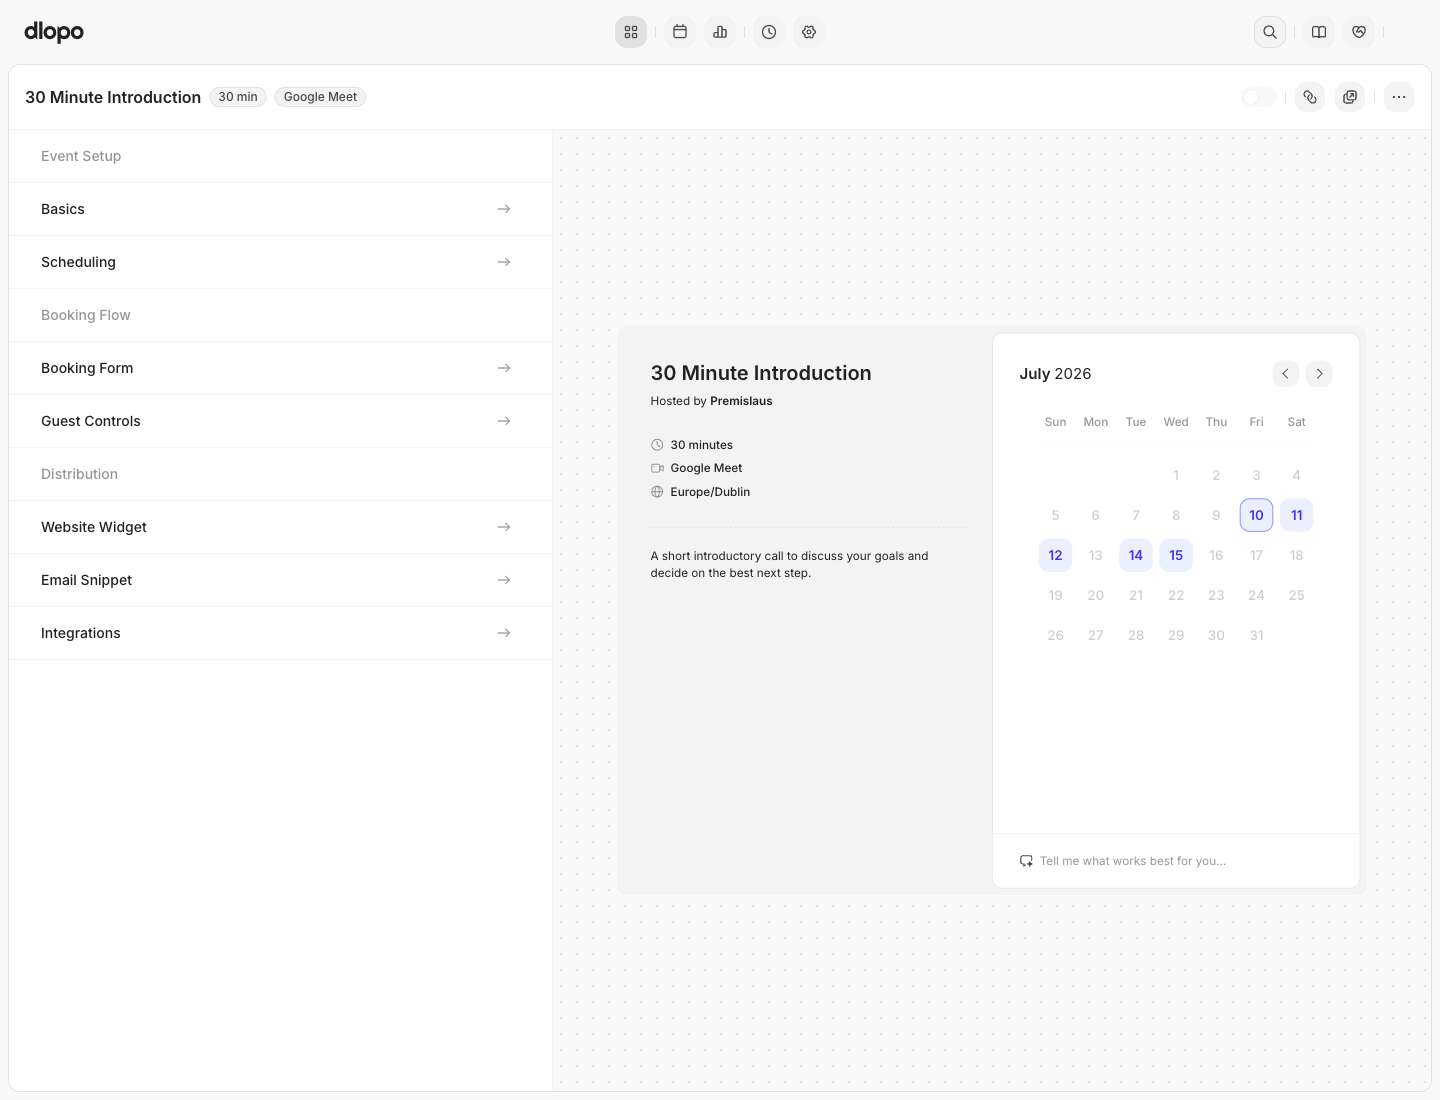
The editor opens automatically after creation. Its left side groups the available settings, while the right side previews the booking page.
Add the basic details
Select Basics under Event Setup.
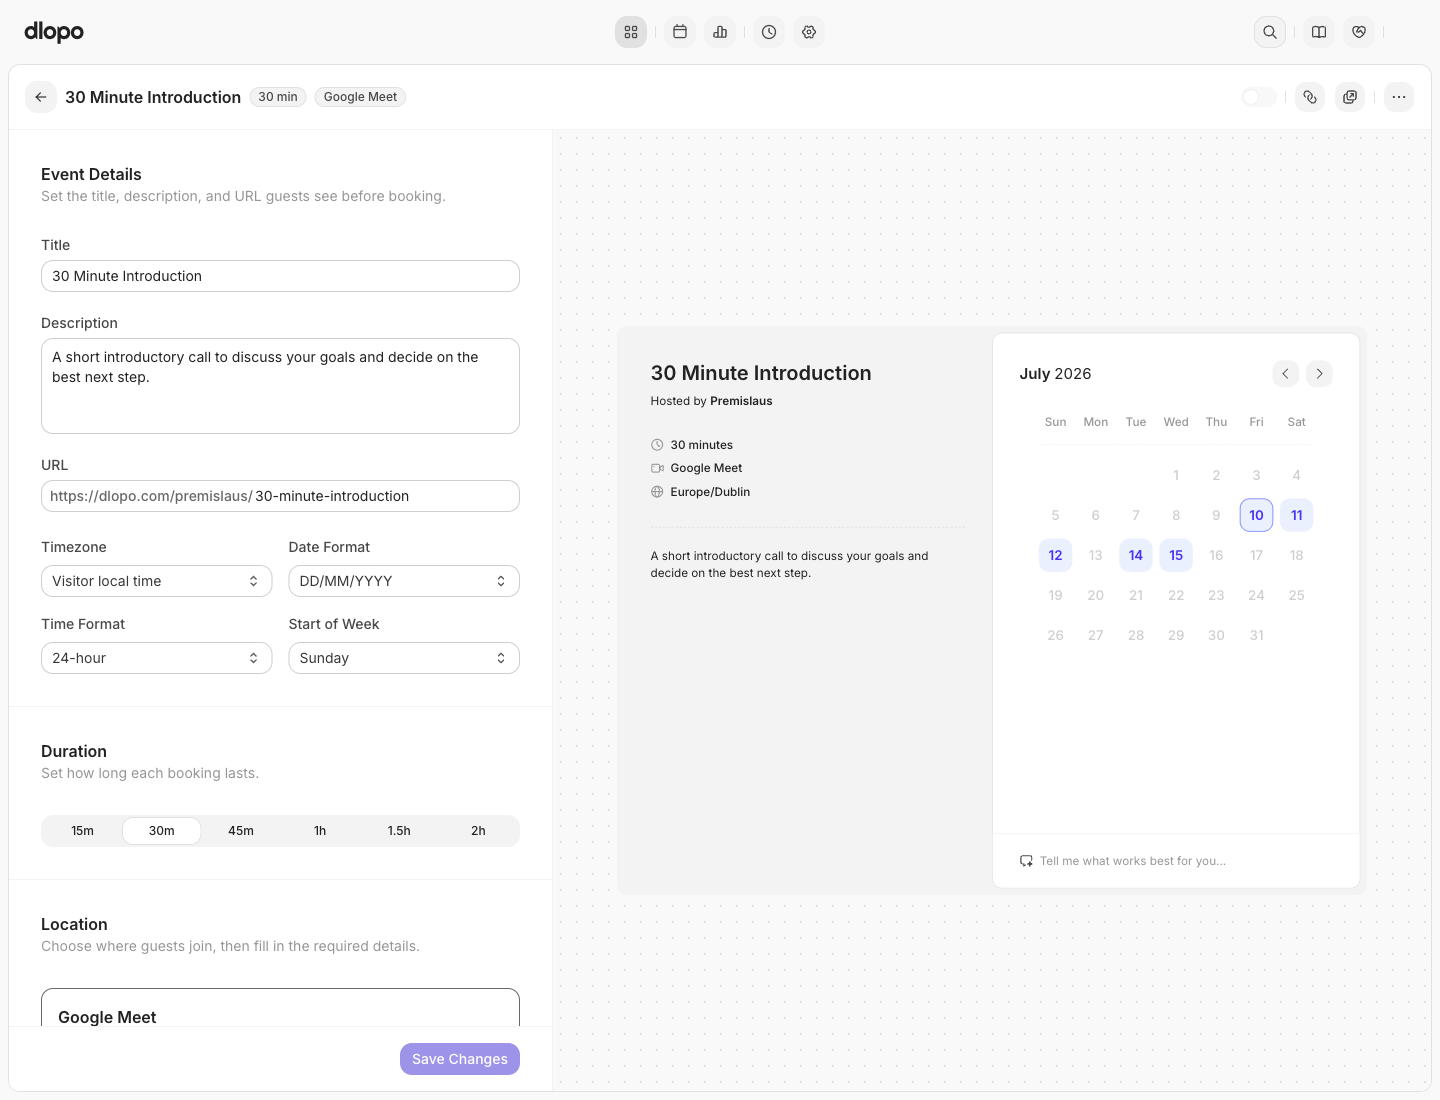
Title
Replace “Untitled Link” with the guest-facing name of the meeting. Use a title that tells guests what they are booking, such as “30 Minute Introduction,” “Product Demo,” or “Portfolio Review.”
Description
Explain what the meeting covers and anything the guest should prepare. The description appears in the booking-page preview.
A description is optional, but it helps guests confirm they selected the correct meeting before choosing a time.
URL
Update the final part of the public booking URL. Use a short, durable value such as
30-minute-introduction or product-demo.The URL value can contain letters, numbers, and hyphens. It must be available for your account. Changing it later changes the booking-page address, so update any places where the old URL was shared.
Display preferences
Review the booking page’s:
- Timezone
- Date Format
- Time Format
- Start of Week
These settings control how the booking page presents available times. The schedule still determines the working hours used to calculate availability.
Choose the duration
Under Duration, select how long each booking lasts:
- 15 minutes
- 30 minutes
- 45 minutes
- 1 hour
- 1.5 hours
- 2 hours
The duration must fit completely inside an available range. For example, a 60-minute meeting cannot begin when only 30 minutes remain in your schedule.
Choose the location
Select where the meeting will happen:
- Google Meet creates a Meet link automatically for each confirmed booking.
- Phone Call collects the relevant phone details and provides call instructions.
- In-Person lets you provide an address or venue.
- Custom URL lets you supply an external video room or meeting link.
Complete any additional field shown for the selected location. Google Meet displays the connected Google account in the editor. An in-person meeting needs an address, and a custom location needs a valid URL.
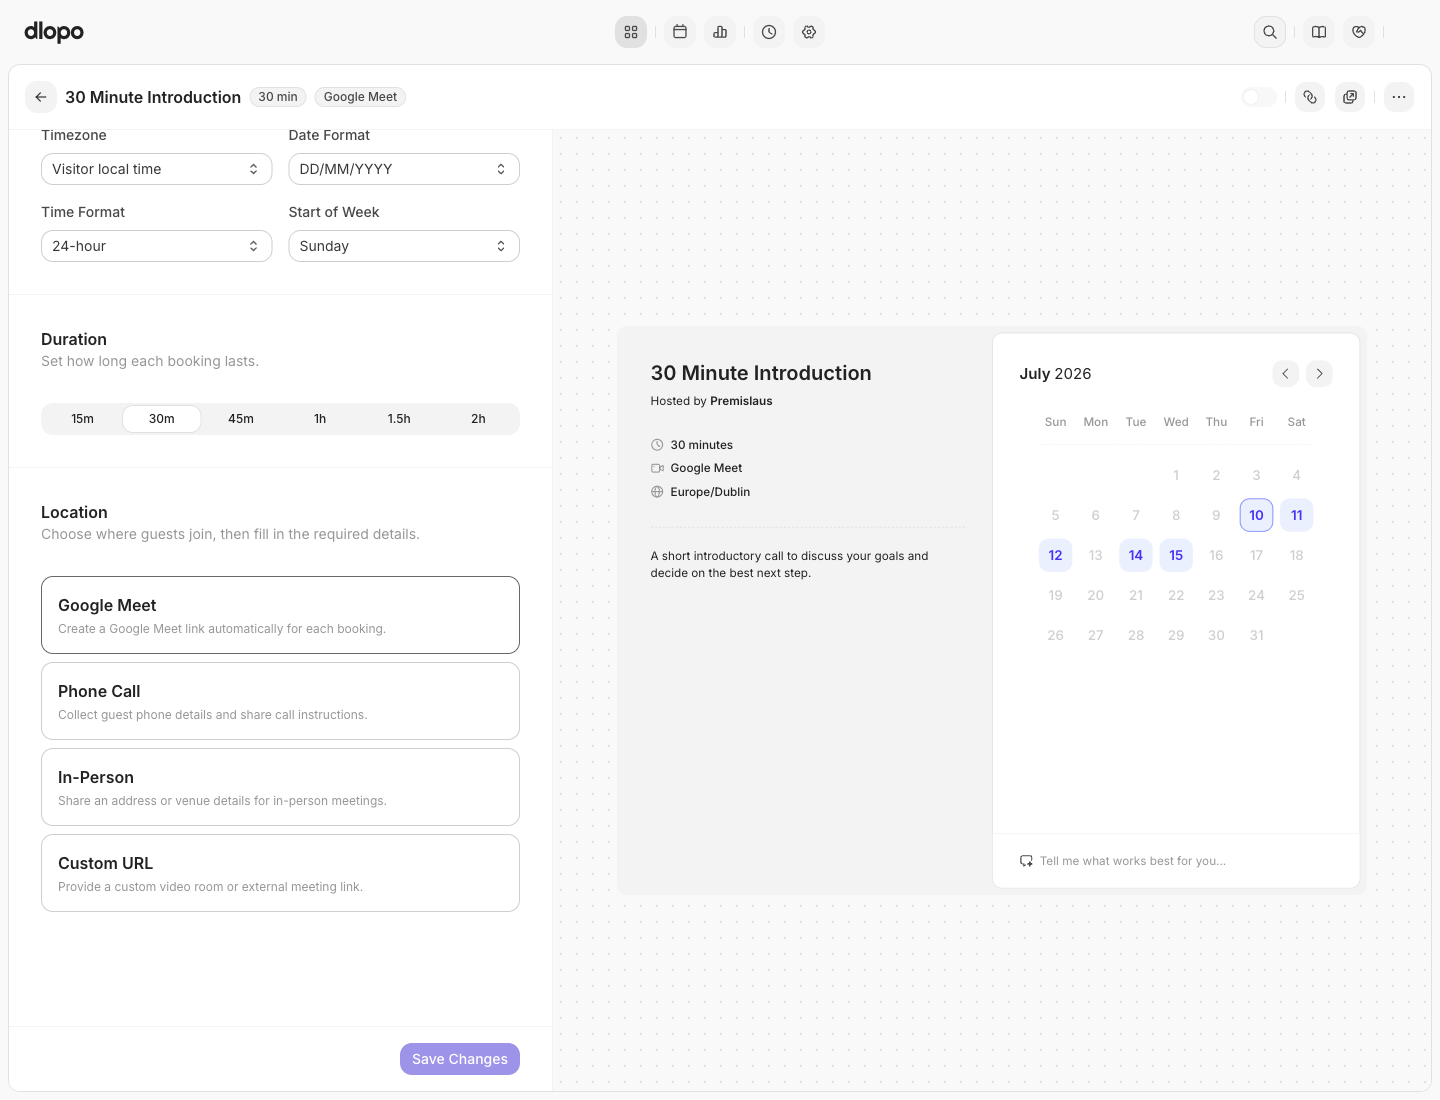
Select Save Changes after updating the Basics section.
Review the remaining settings
A new link starts with standard defaults, but you should review the other editor sections before sharing it:
- Scheduling controls the schedule, buffers, notice, and other availability rules.
- Booking Form controls the guest information and questions you collect.
- Guest Controls covers supported guest actions and after-booking behavior.
- Website Widget provides website distribution options.
- Email Snippet provides an email-safe way to share the booking experience.
- Integrations shows the connected services used by the link.
Name and email are included in the standard booking form. New links also start without payment, redirects, buffers, minimum notice, or a future booking limit. Guest rescheduling is enabled by default.
Publish or keep the link as a draft
Use the status switch in the link header to make the link active or hidden.
If your Free account already has one active public link, Dlopo keeps the new link as a draft and explains that an upgrade is required to publish another. You can still configure and preview the draft.
Test the guest experience
Before sharing the URL:
- Review the live preview.
- Confirm the title, description, duration, and location.
- Check that the expected dates and times appear.
- Open the full preview and select a time.
- Complete the guest form.
- Review the confirmation details.
- Check the booking in Bookings.
- Confirm the supported email, calendar event, and meeting location.
Testing the complete flow catches missing availability, unclear copy, and incorrect location details before a guest encounters them.